
What is Airflow
The need to perform operations or tasks, either simple and isolated or complex and sequential, is present in all things data nowadays. If you or your team work with lots of data on a daily basis there is a good chance you're struggled with the need to implement some sort of pipeline to structure these routines. To make this process more efficient, Airbnb developed an internal project conveniently called Airflow which was later fostered under the Apache Incubator program. In 2015 Airbnb open-sourced the code to the community and, albeit its trustworthy origin played a role in its popularity, there are many other reasons why it became widely adopted (in the engineering community). It allows for tasks to be set up purely in Python.
What you'll find in this tutorial
Not only we will walk you through setting up Airflow locally, but you'll also do it using Docker, which will optimize the conditions to learn locally while minimizing transition efforts to production. Docker is a subject for itself and we could dedicate a few dozen posts to its benefits. However, it is also simple enough and has all the magic needed to show off some of its advantages combining it with Airflow. Even if you are not familiar, the only requirement you have for this tutorial is to make sure you have Docker Engine installed on your Linux/MacOS/Windows environment here.
Using Docker
Docker will basically replicate whichever environment with specific settings and package requirements (an image): an AWS EC2 instance, an Ubuntu based machine running a load balancer or if you simply want to run an isolated environment running TensorFlow or PySpark. When you are sure that a Docker image is set up the way you want it, you simply need to instantiate it with a terminal command. You'll be able to launch and test all possible infrastructures, apps in your local machine while simulating near real production environments. It also means you can rest assured that all components are working before spending resources in the cloud or your own data center.
Step by step
Make a git clone of our repo here and check its structure. You will notice that directories seem deeper than needed for the project. We are merely separating the infrastructure logic from the code logic - in this case where your tasks will be written. In the future, if you need to add your own containerized (and customized) microservices, you would place it side by side in the Docker directory.
>> git clone https://github.com/gosmarten/airflow.git
Assuming you already installed Docker engine, we’ll now begin building our custom image of Airflow. Although it might be somehow limiting, think of a Dockerfile as the series of commands you would do if you wanted to start with a clean slate linux installation (whichever you’d like) and the series of commands you would run in the terminal to run the desired service. In our case this image will have Airflow setup and all packages needed for it on top of a slim version of Linux image that already has Python installed. Also, luckily for us, there is a popular customized Dockerfile by Puckel which is ready for all possible Airflow environments which we'll use.
Building our custom image for Airflow
docker/airflow/Dockerfile has all definitions for our Airflow image setup.
Pay attention to the command bellow where Airflow is installed with accompanying packages (inside the
brackets), with the version which we define at the beginning of the document.
&& pip install apache-airflow[crypto,celery,postgres,hive,jdbc]==$AIRFLOW_VERSION
Now, for Airflow configuration itself check out the config.cfg file under docker/airflow. This file has all the configuration you would need Airflow to have when running: information like URI with PostgreSQL credentials and host (by default it will run on SQLite), Airflow home directory (otherwise it will just store everything under /airflow at the root of the server/pc it is running from) and where DAGs should be stored. Another important choice you can make in settings is what kind of Executor you want to run. By default, Airflow runs in Sequential mode, which means it can only execute one task at a time. While this is ideal for development you should choose another option when deploying into staging or production. This leads us to 2 other options you can select from: Local or Celery. Local will be able to process several tasks on the same machine (without extra containers running other services). Celery will allow you to set up a Scheduler/Worker with separation of processing and scheduling between multiple nodes (for example, several different containers) in isolated environments.
We won't go into the details of this last option, as Celery would be a whole different topic, but rest assured that with the help of an image we are using from Puckel, you won't need to change anything in the image itself. In case you want to evolve your setup to a Celery execution in the future - you’d only need to adjust the next settings.
If you are an intermediate Docker user, you might prefer passing information like login credentials and host specifications upon instantiating the container and that is perfectly fine. Airflow accepts Environmental variables with configuration for most options inside the config.cfg file and these variables take precedence over the file. If you want this, just make sure the format is as follows:$AIRFLOW__{SECTION}__{KEY} (notice the double underscore). So if you wanted to
define/override Airflow home
setting, you would use $AIRFLOW__CORE__AIRFLOW_HOME.
We are happy with the Dockerfile now, so it's time to build it. This means Docker will run all these commands and store the desired "state" of those commands in an image in our computer cache. To do so, run the following command in terminal inside the same directory as the Dockerfile.
docker build -t airflow_tutorial:latest .
Orchestrating containers
Next step is to take a look at docker-compose.yml file in the same directory as the Dockerfile. The docker-compose basically orchestrates which services (or containers) are launched together and their respective settings. We have extensively commented this file in order for you to have a better sense of what is happening line by line and tweak if necessary.
In summary, we are launching 2 different containers, Postgres and webserver, both in the same virtual network so they can communicate by their names (without the need for IP addresses between them). Airflow uses this database to store metadata on the DAGs, tasks, users and their statuses. Airflow is also ready to store and encrypt credentials for services that you need for your tasks: S3 buckets, other PostgreSQL instances, MySQL, etc.
Enter Airflow
Finally we get to the functionality of Airflow itself. In nutshell, a DAGs (or directed acyclic graph) is a set of tasks. For each workflow we define, we can define as many tasks as we want as well as priority, importance and all sorts of settings. Then, the DAGs are pushed.
For each task inside a DAG, Airflow relies mainly on Operators. Operators execute tasks. There are some preloaded ones, like BashOperator or PythonOperator which executes Bash and Python code respectively.
Designing the DAG
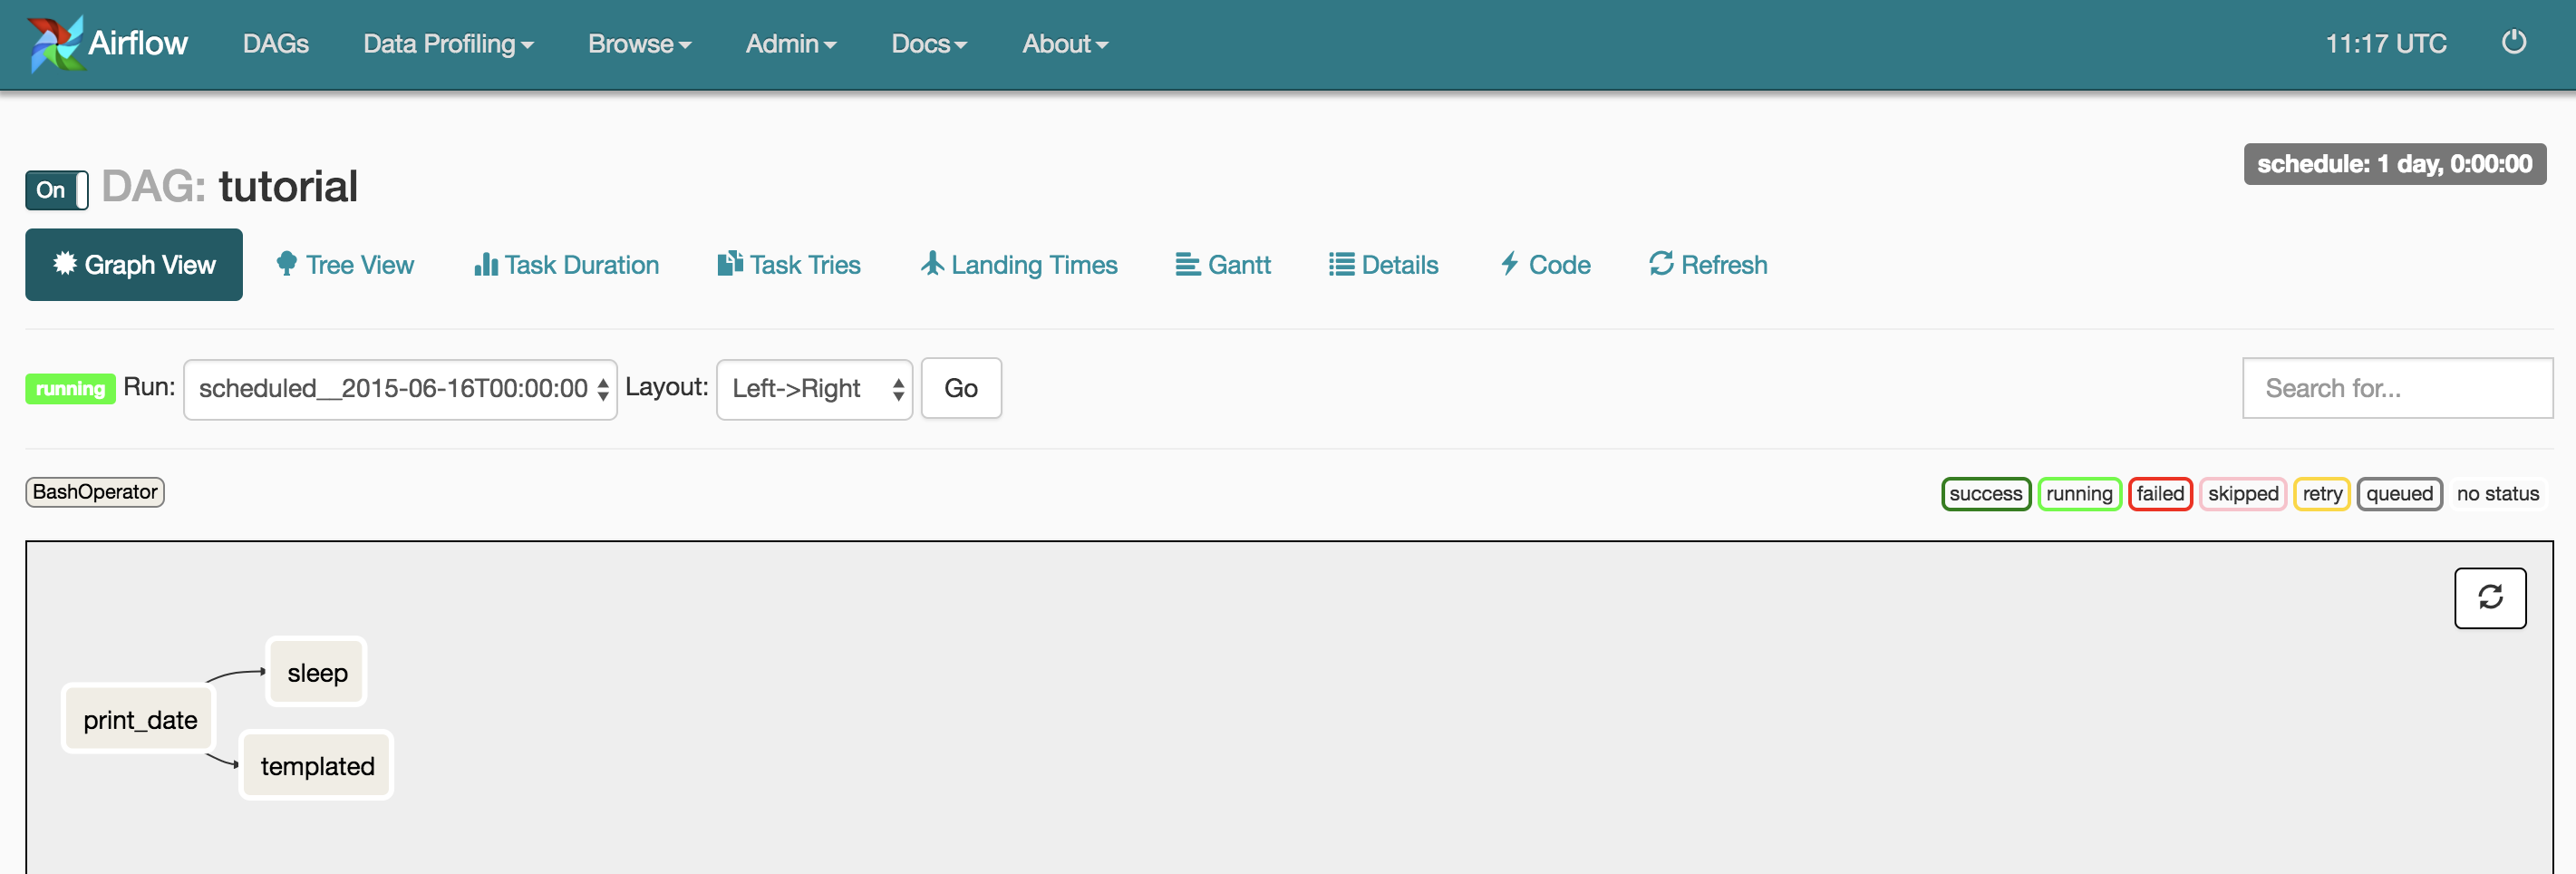
In our tutorial, we'll use default Airflow tutorial.py file which will help us understand the basic concepts of DAGs. It defines a DAG comprised of 2 tasks that run, only if a third one (actually the first one) is successfully executed. All tasks use BashOperator. One of them includes some Jinja2 templating - pretty popular for who uses frameworks like Django or Flask. If you would like to know more about Jinja2 check their website.
The DAG itself is an instantiation of a class, but for it to work it needs:
- The DAG object, and usually some predefined default arguments. It's a good practice to defined some default arguments so we don't repeat too much code and then pass this dictionary as a key, value pair in the DAG itself.
- We need tasks which are basically defined by the type of Operator we need to use. In this case we'll use Bash to print out the date and show off some Jinja2 templating features of Airflow. Notice this templated command is then injected into the task itself as a parameter for the Bash command. Alternatively, if it was a PythonOperator that was calling a function, we could call arguments to the function through the op_kwargs or op_args argument of the Operator.
-
Finally, we need to setup the execution order for tasks. This is what the last 2 lines of code are
doing: we are saying that basically
t2andt3can run in parallel but only ift1runs successfully. This could make sense in an ETL scenario where you would extract data from some source in t1 and then insert it in a database int2while backing it in a form of CSV int3at the same time. They would only be dependent on havingt1finished.
Launching the services
Having all this done, we can now launch our terminal, navigate to the docker-compose folder and run the following command:
>> docker-compose up
This will spin up both services as stated in the docker-compose.yml file. Now you can access http://localhost:8080 in your browser and you'll see your Airflow application listing the DAG we just described before. You should see something very similar to this:
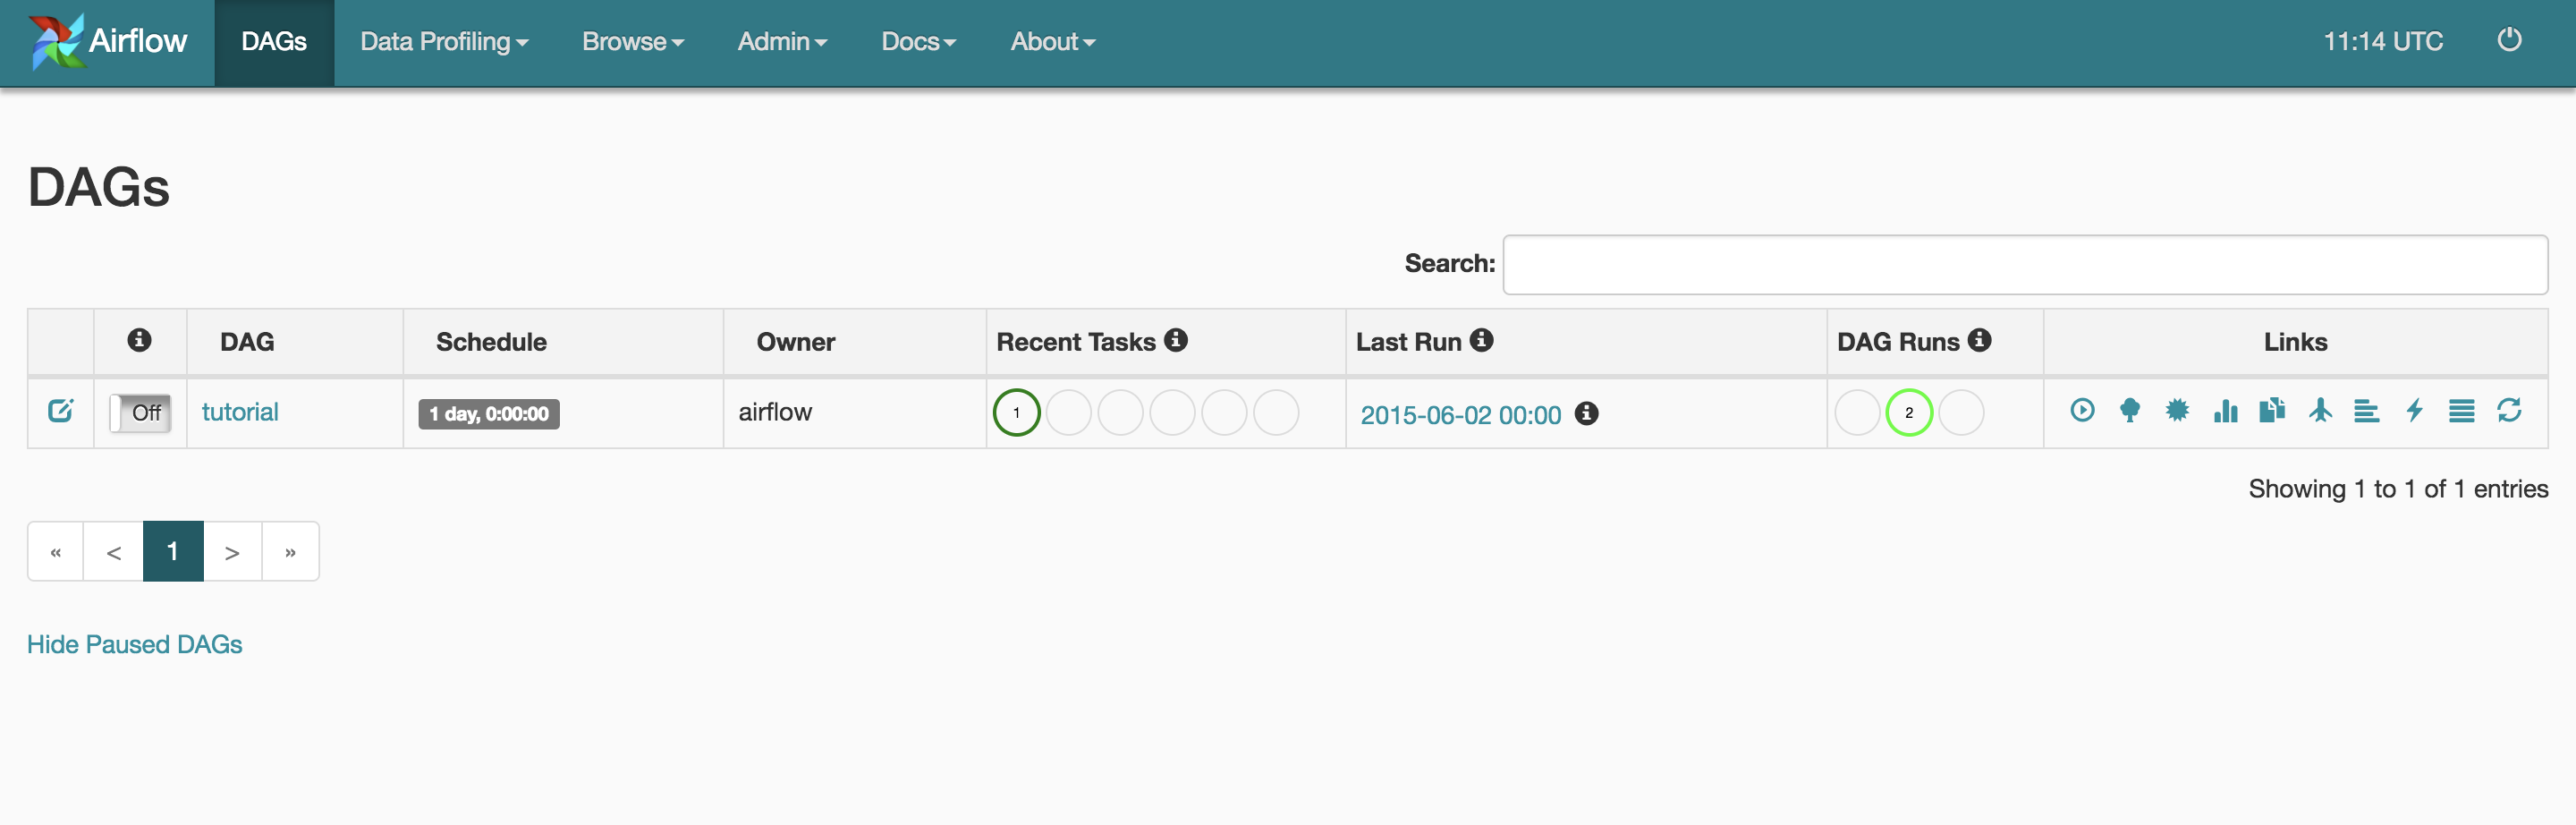
If you noticed the docker-compose comments, we are using docker bind mount of the dags folder which is located in repo/src/dags. Whatever you change in a DAG or create a new one it will be immediately available to Airflow.
To see your DAG in action you have 2 options.
- By default, the DAGs are turned off, so on the home page you can turn it on by clicking the button on the left, right before DAG’s title.
- Alternatively you can press the “play” button, located on the right.
Wrapping up
Soon we'll write about how to move this image to a cloud service and develop a more advanced DAG. If you are familiar with Python, you now have the building blocks to develop whatever functions and design tasks that use all sorts of APIs already available in the Python ecosystem.
The big advantage of using Puckel's image in the next tutorial is that we will be able to use that very same image for different containers that will assume different roles (worker vs. scheduler), without having to modify the image itself - we'll only tweak the docker-compose.yml file to our liking.
In the meantime go and follow us at Github: here